Categories
Hardware

Netgear GSM7224 v1

Originally written in 2018. This post was languishing in drafts for a couple of years. I may complete it someday.

I acquired three old Netgear GSM7224 switches for my lab network some time ago and I pulled them off the shelf recently to use in a project I am currently working on. I wish I had actually checked them out fully when I first acquired them because it has cost me a week or so in time to get them useable in a reasonably secure test network. I did not anticipate the problems getting older high-end Netgear products to work securely in a network environment with up to date patched hosts.
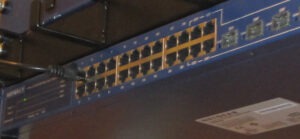
Netgear GSM7224 Ethernet Switch
Netgear GSM7224 installed in test lab

If you are trying to make use of ageing Netgear GSM7224 Gigabit Ethernet Managed Switches you may find this article useful. Some of this may even be relevant to other network equipment running similar firmware Eg. Sun Netra.

Observations

I spent a little time getting familiar with one of the switches on my bench. I used a laptop running Ubuntu 18.04 with a USB Serial adapter and a 9-pin null modem serial cable connected to the switch’s console port on the front panel. As these were second hand switches I didn’t have knowledge of the existing admin password. Resetting the password was at the top of the task list but until then it was time to do some basic surveilance on the switch using nmap. These are my initial observations.

  • Noisy or failed fans
  • Slow start-up time
  • Old firmware. The latest 2007 version is still available for download
  • Log files are time and dated from 1 Jan 1970 at start-up
  • Awful Netgear documentation, lots of critical configuration information undocumented
  • Telnet running on tcp 23
  • No SSH v2 access
  • Unencrypted web management interface on tcp 80
  • No HTTPS for web interface
  • Mysterious tcp 4242 port listening
  • Web Management prompts for Java plugin but 2018 browsers are not able to run Java applets

Objectives

  1. Reset passwords on all switch login accounts
  2. Replace fans with new parts
  3. Document out of band command line management via the serial console
  4. Upgrade firmware to latest version
  5. Fix the time stamps in the log files
  6. Fix the Java plugin requirement
  7. Configure in-band management only from the management VLAN 1 with no internet access
  8. Enable SSH v1 safely via a bastion host running SSH v2
  9. Enable HTTPS web interface only over management VLAN
  10. Disable less secure management interfaces, telnet and unencrypted web management
  11. Enable remote syslog
  12. Enable SNMP

Tools and Equipment Required

  • Netgear GSM7224
  • The latest firmware for the switch. At the time of writing this was 6.2.0.14
  • Laptop or desktop computer that has a terminal emulator.
  • Oracle VirtualBox to host an old distro that has an SSH v1 client or a Windows PC with PuTTY.
  • CD-ROM or ISO image file for an old 32-bit Linux or FreeBSD distribution that was released between 2006 and 2007. This is primarily for using OpenSSL and OpenSSH from this period to fully configure the switch. I used Ubuntu 6.06 LTS x86 as this was still downloadable in 2018
  • 9-pin serial null modem cable.
  • USB to Serial adapter if your computer does not have a native serial port.
  • VT100 terminal emulation program that can connect to the switch’s console session via your serial connection. I used Minicom that was installable from the Ubuntu repos.
  • Netgear GSM7224 Administrators Guide
  • Netgear GSM7224 Command Line Reference
  • nmap or zenmap (GUI version) for testing

Optional Requirements

  • A compatible Java Plugin for a web browser that shipped with your 2006 Linux distro. If you want to try the Java applet function in the switch’s web interface
  • Wireshark if you want or need to decode further the SSH protocol between your switch and ssh clients

Replace the Noisy Fans

All three of my switches had noisy fans. Each has two 40x40x10mm 5VDC 2-pin fans inside and one in each had partially seized which was causing a lot of noise.

Opening the case was just a bit of screwdriver work to remove the rack mounting ears and then the screws holding the case together. All of the externally visible screws have to be removed to open the case. The cover slides off rearwards with a slight upward tilt. Once inside I could see the fans that need replacing.

I opted for cheap replacement fans sourced from eBay but I probably should have put more thought into that decision at the time. Within a few months the replacement fans started getting noisy.

I wish I had documented the fan replacement fully as I am going to use one of these switches again in November 2024. I originally installed brass inserts into the plastic housings of the 40mm fans to enable them to attached with screws to the chassis. I am guessing that the inserts are M3 thread and approximately 4mm deep. I have ordered some more for another set of new fans.

Gain Console Access

I connected a 9-pin null modem serial cable that I use for console access to the switch and to a USB serial adapter plugged into my laptop.

I use Minicom as a terminal emulator to access my switch consoles. Ctrl-A in Minicom gains access to its configuration menu. The connection was configured for /dev/ttyUSB0 at 9600,n,8,1. After saving the settings the switch console login prompt appeared.

My Netgear switches were all purchased used without documentation or being reset to factory defaults. I tried logging in as admin with various popular passwords without luck. Fortunately, rebooting the switches with Minicom still connected and running reveals a boot menu. Select option 2 to access a configuration menu. From here the switch can be reset to factory defaults without needing a password.

Update Firmware

I downloaded the ‘latest’ firmware from Netgear and setup a TFTP server on my laptop to serve the new firmware image. The firmware’s README describes the process to upgrade and although it takes a while silently updating there is eventually some confirmation on screen and the job is done.

I was having problem getting the SNTP client to synchronise time with the NTP servers that I had specified to use. That was until I tried this configuration command that worked…

(GSM7224) (config)# sntp client mode unicast

I also had some problems getting recent SSH clients to work. PuTTY on a Windows machine was useful as is still support SSH v1.

Port scanning the switch revealed that tcp 4242 appears to be used by the switch’s Java client interface. As I am not using the Java client it can be closed using:

no ip http java

More to follow…
Categories
Hardware

Upgrading the CPU on a Dell GX240 – Again!

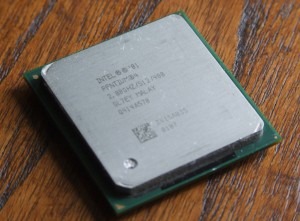
SL7EY-Closeup2
I never expected that I would upgrade one of my elderly Dell GX240 PCs again, but today I did. I have two GX240 tower PCs. One of them has been used as a firewall for five years, the other as it’s fallback spare. I retired both of them a few weeks ago, replacing them with Dell PowerEdge 840 servers. Yes, they are old too, but not as old as the GX240.

I have been planning to upgrade my parent’s firewall with a PowerEdge 840 but I’m working on a project at the moment and can’t really spare one of my modified super quiet ones. I had a job lot of old CPUs arrive today and an intel SL7EY was in the bundle. I soon realized that this was the high end processor for the GX240 and quickly decided that perhaps a GX240 would go on for a bit longer at my parents house.

I stripped down both GX240s and rebuilt one using the best bits from each. I will save the other for spares and scrap them both eventually but for now the best of them gets a 2.8Ghz Pentium 4 with 512KB cache. To my dissapointment, a very large number of the new processor’s pins were bent. It took about an hour or so of work with a magnifying glass and craft knife to carefully straighten them enough for the socket to accept the processor. The PC was booted up with the new CPU and it was correctly recognised in the BIOS setup. A successful upgrade!

The 2.6Ghz Celeron has performed really well and I’m interested to see if the additional 200 Mhz and 384KB of cache that the 2.8Ghz Pentium 4 has make a noticeable difference. I didn’t take any benchmarks before and after, this was just a case of making use of a surprise ‘windfall’. I’m not expecting anything as amazing as the last processor upgrade but I think it was worthwhile doing.

Categories
FreeBSD Hardware

D-Link DFE-570TX and Broadcom BCM5821

I have just acquired a used 4-port D-Link fast ethernet PCI board from a seller on eBay. I have been looking for one of these for my ‘new’ firewall for ages and was about to give up.

The firewall is an old crate of a Dell GX240 with PCI slots but it still has plenty of grunt to do what I need without consuming too much power. It’s one of the old Dells that I bought years ago for peanuts that has been upgraded with a 2.6Ghz Celeron.

I have been experienting with a Broadcom crypto accelerator in pfSense and I was about to give up on the GX240 and move up to a newer old machine with PCI-X slots.

The BCM5821 already delivers 24x performance improvent on 2048 bit RSA in the 33Mhz PCI bus and I am intrigued to find out how fast it will go in a 64 bit, 66Mhz slot. Now that I have the D-Link, I will crack on with the original plan and save the PCI-X upgrade for later.

More to follow…

Categories
Opinion

W3C, please don’t screw up the World Wide Web.

Stop the Hollyweb! No DRM in HTML5.

Categories
Hardware

FOXSAT-HDR Dropbear SSH with keys

WARNING: This article relates to the dropbear package version 2012.55 and not the updated package 2012.55-1 that now includes the ability to login with keys. It is no longer necessary to use these instructions to modify the dropbear installation on your FOXSAT-HDR. The instructions on how to generate and distribute client keys are still valid.

I have just upgraded the functionality of my Humax FOXSAT-HDR with some custom firmware. The new firmware came with Telnet active but I prefer to use SSH with RSA or DSA keys. Dropbear is the installable package that provides SSH for the custom firmware but I couldn’t find any documentation with the firmware that explained how to get it working with client keys.

Following an evening of research and experimentation, I found a way of getting it to work. Ubuntu/Linux/BSD users can use this process to configure Dropbear on the FOXSAT-HDR to use SSH authorized_keys instead of passwords. I worked around the read-only file system by changing the root account home directory to /tmp.

Install Dropbear on your custom firmware FOXSAT-HDR using opkg or the web interface. Test that it works using a password. Dropbox appears to be configured to use only the root account. From my Ubuntu machine I login from a terminal session using:-

ssh root@foxsat-hdr

When you are happy it is working OK. Open another terminal session and create a DSA public key file on your Ubuntu PC. The file will be ~/.ssh/id_dsa.pub

cd
cd .ssh
ssh-keygen -t dsa
ls

Copy the key(s) to the FOXSAT-HDR. You may already have a public RSA key present in the .ssh folder.

scp id_*.pub root@foxsat-hdr:/tmp

If you are not already logged in to the FOXSAT-HDR via SSH, do so now to create the two authorized_keys files required.

cd /opt/etc
mkdir .ssh
chmod 700 .ssh
cd .ssh
cat /tmp/id_*.pub >> authorized_keys
chmod 600 authorized_keys
ln -s /opt/etc/.ssh/authorized_keys /opt/etc/.ssh/authorized_keys2

Create an init.d script to fix the keys on startup. The root account will have it’s home directory moved to /tmp so that the hidden key folder can be found in there. The ‘echo’ command line is quite long and ends in ‘fix’, it is not two lines.

echo -e "#!/bin/sh\n\nln -s /opt/etc/.ssh /tmp/.ssh">/opt/etc/init.d/S55sshpubkeyfix

chmod 755 /opt/etc/init.d/S55sshpubkeyfix

Now edit the password file using vi to change the root account home directory from ‘/’ to ‘/tmp’. If you don’t know how to use vi, read this first. Otherwise, here is a command list to refresh your memory.

cp /opt/etc/passwd /opt/etc/passwd.old
vi /opt/etc/passwd

When you have saved the file. Check it, then reboot if it is good.

cat /opt/etc/passwd
reboot

Your FOXSAT-HDR will reboot and you should be able to login using SSH. This time switch on debugging to check the authentication sequence during login. If it works, you will not have to use a password to establish a secure shell.

ssh -vv root@foxsat-hdr

Telnet can be deactivated using ‘Service Management’ in the web interface.

I have more than one SSH client

If you want to use SSH from another Ubuntu PC it is easy to copy its DSA client key to the FOXSAT-HDR now that the authorized_keys file has been created.

ssh-keygen -t dsa
ssh-copy-id root@foxsat-hdr

Improvement

This could be incorporated into the Dropbear package if the maintainer emptied the authorized_keys file (zero length) before sealing the package file. Users would then only need to use ssh-keygen and ssh-copy-id to make use of the additional security.

Categories
Hardware

Custom firmware for Humax FOXSAT-HDR

I have been using my Humax FOXSAT-HDR since I bought it new in 2009 and functionally it hasn’t changed much bar the addition of BBC and ITV catch-up TV services. I have always hoped that the manufacturer would issue a DLNA server upgrade to the firmware, but it never came. That is until today…

While searching the internet to find if the Freesat+ YouTube player was available for the FOXSAT-HDR, I found a custom firmware distribution that has been in development and use for some years that could be used to provide web access and DLNA services.

There is no dedicated website for the firmware but it appears the www.avforums.com is the place to go for community support and the latest downloads.

The version that I downloaded and installed was v4.1.1 . It came in a RAR file that I decompressed into a folder on one of my Ubuntu machines. I copied the files to a 1.1GB USB stick formatted FAT32 as advised in the README but it wouldn’t boot the new firmware installer. I found another stick that was 985MB when formatted and it worked perfectly. The installation was exactly as described in the instructions and when the FOXSAT-HDR rebooted there was no visible change other than the firmware version being displayed on the front panel during boot up.

Pointing a web browser at the box, I continued to install the full web interface. When complete I could see that the DLNA server was an installable package but I couldn’t get the package list to update from the web interface. No problem, I telneted into the box and used the command line instead.

opkg update
opkg list
opkg install dropbear

I installed dropbear so that I could deactivate Telnet and use SSH instead. More on this later.

After installing dropbear via the command line the web interface tabs for ‘Installed’, ‘Available’ and ‘Upgrades’ worked but the main ‘Update package list from internet’ still doesn’t work from the web interface.

I am currently experimenting with MediaTomb uPNP to serve recordings to my son’s PS3 but I think I will try the TwonkyMedia 5 DLNA server as originally planned. Twonky charge 15 Euros for the licence activation but I guess it’s probably worth it.

If you wish to rollback to the original firmware, you will need an installable image of it. I found one that I could download v1.00.21 from here.

3 May 2015
I should have updated this a long time ago as I have since upgraded my Foxsat-HDR to v4.1.2 and then on to v4.1.3
I am really impressed with the current version. Everything works well as flashed and with the addition of some of my own custom modifications to get it working with my WDTV-Live box.

Categories
Opinion

Do you use self service checkouts?

I don’t. It’s not that I don’t think that they offer any benefit to me, it’s more about the harm that they do to the store’s local economy.

The primary function of a self service checkout is to reduce the cost of having staff at a store. The more customers that use them, the less staff the store needs to employ to work at traditional checkouts. The savings of which are usually passed on to investors as dividends than to the customers as lower prices.

A store that employs real people to perform their checkout function will usually pay a local person to perform this job. That person will in turn spend a proportion of their earnings locally, which will have the knock on effect of providing employment for someone else in their community that serves them.

Conversely, a store that uses self service checkouts provides fewer local jobs, potentially increasing the number of unemployed people locally by denying them this work. For those that are in work and paying taxes, self service checkouts contribute to the burden of unemployment benefit payments locally.

So, if you are a tax payer and use self service checkouts, you only have yourself to blame for increasing the unemployment burden on your tax contributions. The next time you go to a store that has self service checkouts and you get shuffled into using one by ‘helpful’ staff, politely decline by saying “I would rather give a local person the opportunity to be paid for serving me”.

Sometimes using a human operated checkout can take longer than a self service checkout, particularly if you have to queue to be served. It is worth taking the time to queue. I usually make a point of using the checkout nearest to the self service machines and letting the person at the checkout know that I chose to spend the time waiting to be served so that they had a reason to keep their job. If there are people using the self service checkouts I will often comment “The people that use those self service checkouts are causing more unemployment in this town”. It makes some people stop and think.

Categories
Hardware Linux Ubuntu

Unable to enumerate USB device on port…

I have an old PC with what appears to be a broken implementation of USB. I cannot obtain a BIOS update and there is no BIOS setting to switch off USB either. Very old Linux distributions would run on this PC, but only on those with USB support as loadable modules. For later kernels with direct USB support I would get continuous error messages to the console.

After spending some time Googling, I found this useful post

For Ubuntu 10.04 LTS I used the advice to create rules to deactivate USB entirely on this host. The first file that I created was /etc/udev/rules.d/20-disable-ehci.rules which contained the following code:-

ACTION=="add", SUBSYSTEM=="pci", DRIVER=="ehci_hcd", \
        RUN+="/bin/sh -c 'echo -n %k > %S%p/driver/unbind'"

When I rebooted the PC, it disabled one of the troublesome USB hubs but I was still getting error messages for another but much more frequently now. I experimented by creating a similar file to deactivate ohci but this didn’t do anything. I tried again with uhci and that worked, USB completely disabled.
/etc/udev/rules.d/30-disable-uhci.rules

ACTION=="add", SUBSYSTEM=="pci", DRIVER=="uhci_hcd", \
        RUN+="/bin/sh -c 'echo -n %k > %S%p/driver/unbind'"

So if you have two or more USB hubs throwing enumeration errors, try disabling both EHCI and UHCI, it worked for me.

Obviously, if you have any USB devices that you need to use with this host, forget it. You will need a new motherboard.

Categories
Hardware Linux Ubuntu

What to do with an OldWorld Mac?

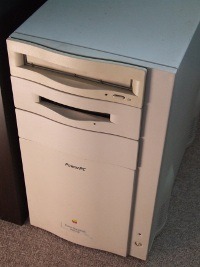
PowerMac 8500 (CK6391DE8FA)During our recent house move I found my old and dusty PowerMac 8500/180 while we were packing up the contents of my garage. It had been placed on the bottom shelf of my car spares shelving for a time when I could either make a VGA adapter cable or acquire another old Mac monitor to replace the one that died. That was back in 2004, and as time passed by storage crates piled up in front of it and it was soon forgotten.

A long time ago I was a NetWare specialist and I had a variety of non intel computers in my private lab that I used for working on interoperability projects. Many of my customers had a small number of Macintosh computers in their organisations and I acquired my 8500 second hand when one of them switched to Windows a year after purchase.

I can’t say that I was a Mac specialist in any sense. My interest was purely interoperability with NetWare, Unix and other corporate host based systems. I tinkered a lot with Applescript and had a lot of fun with my 8500. However, I didn’t like the fact that Apple built the machine to be supported only by their own engineers. There weren’t any manuals for DIY upgrades as you were supposed to take the 8500 to an Apple technician for things like RAM upgrades. I soon learned that Apple products were all about lock-in. I found this aspect of Mac ownership distasteful to the point that I probably wouldn’t buy another Mac again even though I liked my 8500.

So time moves on. It’s 2011 and the 8500 is sitting in my new garage. I don’t want to leave it there to deteriorate for another seven years so I dust it off and bring it into the house to see if it still works. I still don’t have a Mac to VGA adapter but the 8500 has TV output. I connect it to my 42″ LCD TV using an RCA composite TV cable (Yellow-Red-White). After plugging the onboard Ethernet into a live switch on my LAN, and completing the remaining connections for power, keyboard and mouse, the Mac powers up and the familiar chime is heard all over the house through the TV speakers.

I was really pleased that it still worked after all this time. I found some old QuickTime video clips of the kids when they were younger in a folder on the hard drive. I guess when the monitor died I didn’t have any way of accessing my files to save them back then. I set about copying off the files I wanted to keep by uploading to my file storage using Internet Explorer 5 that was still on the Mac and then I began depersonalising the machine ready for disposal. While I was dragging files to the Wastebasket, I started to think that maybe I could use this machine with Ubuntu or Debian as part of my CCTV system. After all, it had on-board analogue video capture that was too fast for any hard-drives produced at the time. Perhaps someone had developed the necessary drivers for V4L2. I didn’t stop too check first, I downloaded a copy of Debian 6.0.2.1 as I thought this would work with an OldWorld Mac and set about installing it.

Oh dear. It appears that a Mac monitor is necessary to install Linux as the TV display doesn’t work when Bootx is used to start the Debian installation. The next problem I have is that I don’t have any Mac OS installation media any more to resize the Apple partitions. A house flood in 2009 saw a lot of my stuff go in the rubbish skip never to be replaced. All my obsolete computer manuals, books and software were either destroyed or water damaged and I’m fairly certain that my Mac OS 8 install disks went in the same skip. I pack up for the day and think about how I can resolve this problem overnight.

The following morning I have an idea. Another old PC that was similarly shelved had a Matrox Mystique card inside. This had a Mac display port so I thought It may have originally been Mac compatible. I relieve the PC of the Matrox card and install it in the Mac with a USB 2.0 + FireWire PCI card. A 60GB portable hard drive is connected to the USB port and a flat panel LCD display to the Mystique’s VGA port before rebooting the Mac.

Mac OS 8.1 starts up and is displayed on the TV. I pop in the Debian CD-ROM and copy the installation kernel and ramdrive to the Linux Kernel folder in the Mac System Folder and configure Bootx to use them. Starting Debian from Bootx the TV display loses its signal and shows the default blue screen. The LCD monitor is now showing a familiar penguin and I can see that Linux is booting and in the hardware detection phase.

I manage to successfully create a Linux partition and swap partition on the USB hard drive but the installation always stalls at some point when unpacking an archive on the CD-ROM. Looking at the logs, the installation is almost there, but the live kernel has not been created in /boot and it’s not good enough to even try building it by hand. Disappointed, I abandon this project yet again to think about it overnight.

Next morning I have an idea. I downloaded the last Ubuntu distribution that officially supported the PowerPC architecture. The Alternate install image for Ubuntu 6.06 LTS PPC seemed most appropriate considering that my Mac has only 96MB of RAM. I replaced the Bootx kernel and ramdrive from this CD and recommenced installation.

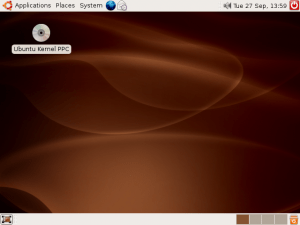
Screenshot of Ubuntu 6.06 on my PowerMacSuccess! The installation is plodding along well. I let it run on its own all day, coming back now and again to check progress and answer any waiting prompts. When it finished I rebooted and logged in to Ubuntu at 640×480 resolution. I started up the System Monitor and had a played a game of Solitaire before tweaking a few settings one by one.

Disaster strikes! Somewhere during the installation I failed to notice that the Mac didn’t have a network connection when running Linux. My Ethernet switch indicates that the on-board MACE (Mac Ethernet) is present at 10Mbps but it won’t DHCP or accept a static IP address. I try installing an Intel E100B PCI adapter and it’s the same. Booting back into Mac OS 8.1 there’s no network now. I just can’t get it to connect. I tried zapping the PRAM and NV but I couldn’t check the OpenFirmware on the serial port as I don’t have a Mac serial lead anymore.

Without a network connection, this 8500 is useless to me. So, the final enjoyment I got from my Mac was using Ubuntu 6.06 on it. I’m not sure if it was any quicker than Mac OS 8.1 as I only have 96MB of RAM installed but it was an interesting exercise on how to get Ubuntu running on a Mac without the Mac OS install discs.

Sadly, I don’t have a use for a Mac that cannot connect to my LAN. I can’t explain why the MACE shows a connection on my switch but refuses to load TCP/IP. Maybe the logic board got a static zap when I was plugging in PCI boards. Maybe I have pressed some key sequence that has deactivated the board in OpenFirmware without my knowledge. If I don’t find a way of getting the onboard Ethernet running again under Mac OS this Mac will be going to the recycling centre very soon.

Categories
Security Ubuntu

Installing Zoneminder on Ubuntu 11.04

I have been experimenting with Zoneminder recently, using the pre-built package for Ubuntu 11.04. I couldn’t get the package to work properly but found some very useful instructions in the Zoneminder Wiki that made it work.

When I finish the installation I will put this into an install script.